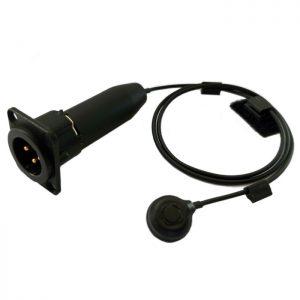
inside X48C

inside X48C
ISCHELL Pickups
Thank you for purchasing a system ISCHELL. We are delighted to welcome you to the growing number of world-renowned music, technician, audio engineers and artist users who have chosen to use our systems.
We are at your disposal and we will always remain so over time, for any question relating to the use of our systems on your instrument. Your complete satisfaction is a priority for us. Consult the online help and contact us if you cannot find the solution to your problem.
- The model inside X48C is equipped with the new type of contact microphone developed by the brand ISCHELL in 2008 and which succeeds the previous technologies, in order to reproduce with the greatest fidelity the acoustics of your instrument, the attack, the timbre, the woody color, your playing and your playing nuances, without the problems of feedback and resumption of surrounding sounds. Our hybrid Air / Contact technology works without a filter between the membrane and the soundboard of your instrument. We thus reproduce on a reduced and isolated scale an ultimate aerial sound pickup, controlled by the immediate environment of our specific putty audio adhesive.
- The sound is comparable to an aerial microphone, fidelity, warmth, width, air… With the acoustic insulation and the feedback resistance of a cell allowing high levels face / returns. You can easily use it in an amp, apply effects or make clean loops. A revolution in the amplification of many instruments on stage! An innovation ISCHELL !
- All our products are manufactured and assembled in France by hand, with awareness and respect for a job well done, only with high quality components, for products that we hope will bring you satisfaction for many years on stage, in the studio and at each of your performances amplified.
- You made the right choice, the model inside X48C is permanently installed with drilling, it is easy to use, operates on phantom power from 9 to 48 volts and adapts to many instruments ...
- We strongly recommend that you take a few minutes to read this manual. Indeed, it is important to respect a few principles in order to benefit simply and quickly from these new systems.
What you need to know !
- Always unplug your instrument before attempting placement again or changing the low cut.
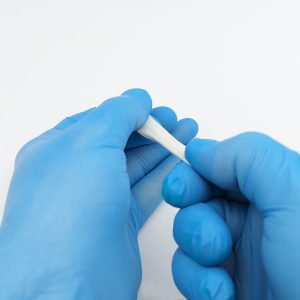
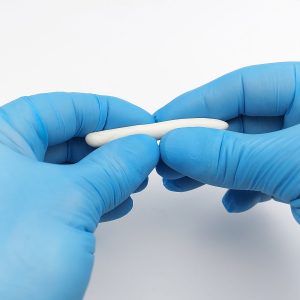
- Carefully reform the roll of putty adhesive as shown, every time!
- Wash your hands before kneading the putty and carefully clean the bonding spots before doing your tests, they should be dry, non-greasy, clean and smooth.
- Use only the audio adhesive putty ISCHELL !
- This system requires 9v to 48v phantom power to operate.
- The electronics contained in the XLR are fragile. Operate gently to act on the low cut. A small pointed object is needed to operate the switches.
- The use of the low cut is not compulsory and depends on the instruments. The 360Hz cutoff is the default position for acoustic instruments, but not for all. We preset the position for your instrument. If after finding the best mic position you lack bass width, then try 180Hz (Mid position) or Flat (Full bandwidth) and vice versa if you have too much bass.
Low cut inside the XLR:
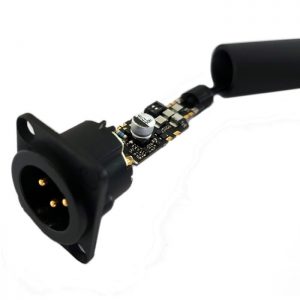
- Open the XLR as in the photo. A small switch is inside allowing three positions 180Hz / 360Hz / Flat.
- The two switches on the left cut the bass below 360Hz (maximum cutoff).
- To have all the bandwidth (Flat), push the bottom switch to the right (the top one stays on the left).
- The 180Hz position is obtained by putting the top switch on the right (the bottom one remains on the left).
Drilling and installation in the instrument
- We advise you to call on a luthier to drill your instrument, depending on its fragility, if you do not know how to do it or if you do not have the necessary tools.
- Do some microphone testing on your instrument before installation and drilling to make sure you've made the right choice. Locate the location of the microphone.
- Choose the position of the XLR on the instrument. The location should not be in the way when playing and should allow the cable to descend naturally to the ground.
- To minimize the overall diameter on a fragile instrument, drill the chosen location to 22mm with the appropriate bit for the wood of your instrument and in the manner required. Stepped conical drills are the most suitable for gradual drilling without risk.
- Insert the micro C1 through the hole then position the XLR on the hole to mark the location of the 3 round shapes to be filed around the central diameter. These shapes will then define the axis of the connection.
- File the 3 locations marked with a round file so that the XLR can be fully inserted.
- Once the XLR is in its final place, locate the center of the 2 screw holes.
- Make a pre-drill for the fixing screws, usually 2mm
- On a curved surface, lightly file the installation surface with a large flat file to create a flat area
- Insert the microphone through the hole and tighten the 2 fixing screws.
- Position the microphone in the recommended location for your instrument. Do your tests, reposition the microphone if necessary several times.
- If your instrument is not fragile or the wood is thick, you can drill the instrument to 24 mm which is the total diameter of the connection: Neutrik PDF drilling
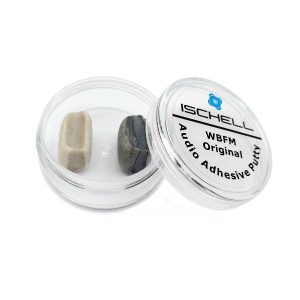
Choice of adhesive putty for the C1 Original:
- Your system is delivered to you with 2 doses of adhesive putty, one white and one gray, they do not have the same sound.
- The white putty has a linear sound and rather bright in the highs, this is the one you should use by default for your testing.
- The gray putty sounds rounder in the bass and duller in the treble. When the sound remains too bright with the white putty, try with the gray putty in the same spot. Suitable for very shiny instruments and sometimes for quartet, double bass, violin ...
- We recommend that you start testing with the white putty. If after determining the best position the sound remains too bright or lacks roundness, then try with the gray putty in the same spot.
Preparation of the C1 Original contact microphone
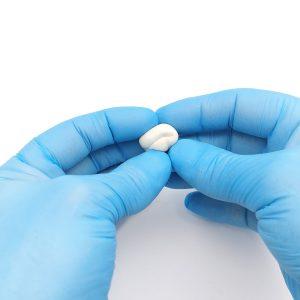
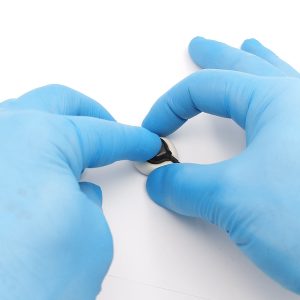
- Knead and stretch a portion of the supplied putty audio adhesive for at least 30 seconds to heat it up and make it stickier.
- If it is less than 18 ° in your room, you can possibly warm it slightly by bringing it near a source of gentle heat.
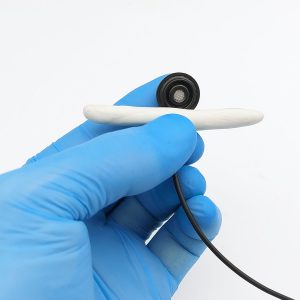
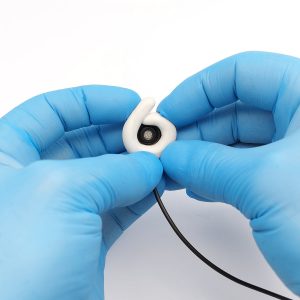
- Then make a regular roll 6cm long and 6mm in diameter.
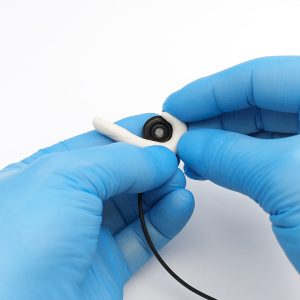
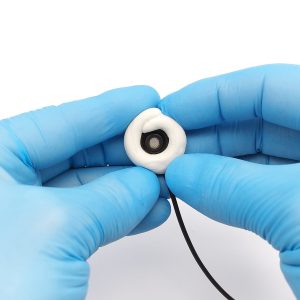
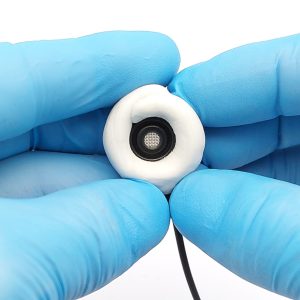
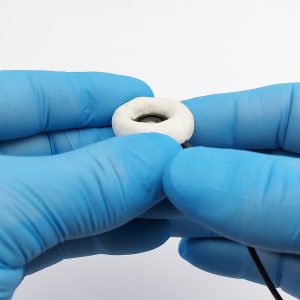
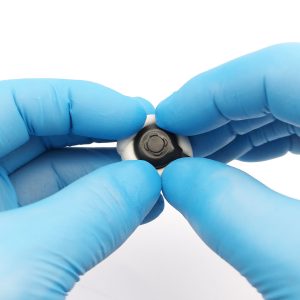
- Then place it around the edge of the microphone provided for this purpose, taking care to connect the two ends of the roll well by covering them, then release the central part without crushing it
- The place chosen for installation must be clean and dry, degreased if necessary.
- Put the microphone down then press it lightly, it should not touch the instrument, approximately 2 / 3mm.
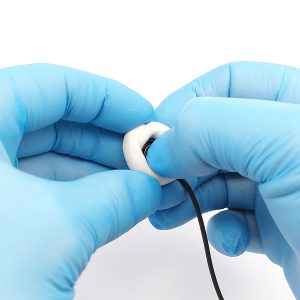
- Then seal the putty all around the mic to make the middle part of the mic airtight.
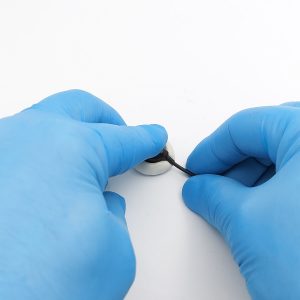
- Then place a cable clip 3/4 cm with a little putty to avoid picking up noise by the cable.
- If during the first tests a sharp feedback is heard, it means that the seal has not been respected, press the putty all around the microphone again.
- If you find that the tonal balance is good but the sound is not homogeneous in its dynamics (volume of the notes) or harmonics, lightly press the microphone again, this will compress the sound and may correct these problems. If possible, use the adjustable shim provided. See below.
- If you think you have compressed your sound too much, you can, without removing the microphone, try to pinch it to make it go up a bit. Attention, all these manipulations must be unplugged microphone.
- Important: Only use the audio adhesive putty ISCHELL, any other putty will distort the sound.

Compression control
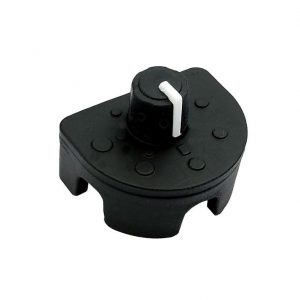
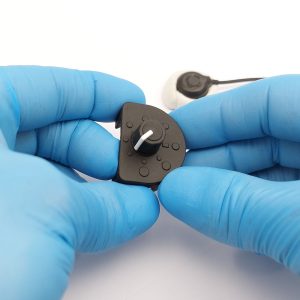
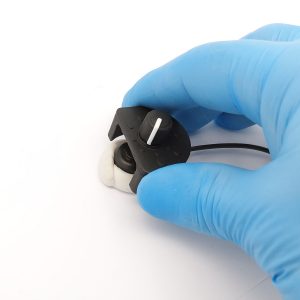
You can use the included adjustable compression shim to control the pressure on the mic. Indeed, the pressure on the microphone acts as an audio compressor, the more you push it into the adhesive putty, the more you compress the output sound, so you will have less level but a more stable sound in its dynamics. Can also correct harmonics that would be redundant on a violin, folk guitar ...
- Place the microphone where you want it and lightly press it down.
- Adjust the level of compression by turning the knob on the cleat.
- Place the wedge on the microphone and press until it touches the surface of the instrument.
- Wait a few seconds, remove the wedge then seal the putty all around the microphone to ensure a seal.
- Try the instrument.
- Increase the compression level if necessary by repeating this operation.
- The average compression point is located between the 5th and 7th point on the cleat, starting from the smallest.
- Can be used to know the compression of your microphone if you need to remove it in order to reproduce it. Place the wedge on the microphone and then turn the knob until you feel you touch the microphone. Note the value of the button in order to reproduce this depression during the next pose.
Choice of adhesive putty for C2 and C3:

- Your system is delivered to you with 2 doses of adhesive putty, one white and one gray, they don't have the same sound.
- The white putty has a linear sound and rather bright in the highs, this is the one you should use by default for your testing.
- The gray putty sounds rounder in the bass and duller in the treble. When the sound remains too bright with the white putty, try with the gray putty in the same spot.
Preparation of contact microphones C2 and C3
- The amount of putty used to place the microphone influences the compression of the sound. The dose provided is 3,5 grams. With the full dose of putty, the sound is not compressed, with half, or 1,5 grams, the sound is very compressed.
- By default, to start your tests, remove a third of the dose to have approximately 2,4 grams which corresponds to an average compression. Knead and stretch the putty for at least 30 seconds to warm it up and make it stickier before use.
- If it is less than 18 ° in your room, you can possibly warm it slightly by bringing it near a source of gentle heat.
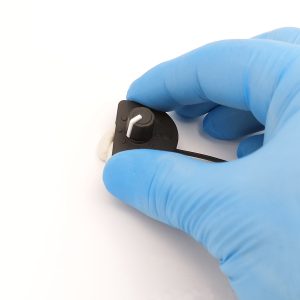
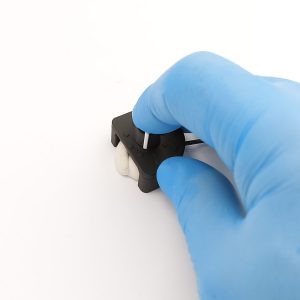
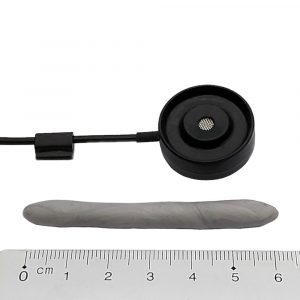
- Then make a regular roll 6 cm long.
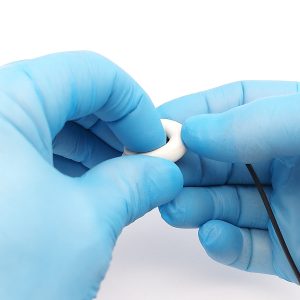
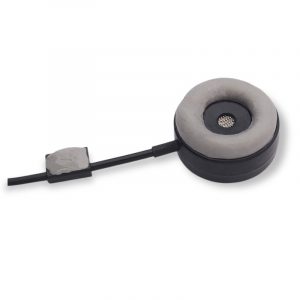
- Then place it around the edge of the microphone provided for this purpose, taking care to connect the two ends of the roll well by covering them, then pull out the central part to form a bowl. Take inspiration from the photos below for the preparation of the putty and its placement around the microphone.
- The place chosen for installation must be clean and dry, degreased if necessary.
- Place the microphone then press on it by making a very small movement from left to right to make it adhere well and ensure the seal.
- Then place a cable clip 3/4 cm with some remaining putty to avoid picking up resonances through the cable.
- If during the first tests a high-pitched feedback is heard, it is because the seal has not been respected, press the microphone again.
- About sound compression: it allows you to balance the power of the strings or notes between them, it also helps to attenuate any annoying harmonics and to reinforce bass and precision. However, if it is too compressed, the sound can become harsh in the attacks, closed, with a lack of resonance, expression or presence in the treble. With a sound that is not compressed enough, there may be an imbalance between notes or strings, redundant or distracting frequencies, a sound that is too broad with a lack of precision. Adjust the dose according to the result obtained.
- If the microphone does not seem to be in the right place, gently remove it then reform the putty all around by giving it height, you can then try again positioning without having to redo the process of preparing the microphone.
- If the sound is too bright, use the gray adhesive putty which has a duller sound in the highs and rounder in the lows.
- Important: Only use the audio adhesive putty ISCHELL, any other putty will distort the sound.



Features
- Model inside X48C ISCHELL
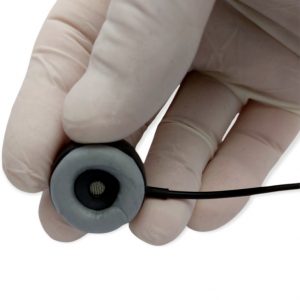
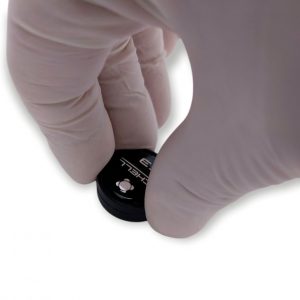
- Contact microphone C1, C2 or C3 ISCHELL
- Specifications of the different microphones
- specific putty adhesive audio provided
- Active electronics
- High pass three positions: 360Hz, 180Hz, Flat
- Balanced XLR output
- Requires 9v to 48 volt phantom power to operate
- Cable length depending on the instrument, 45 - 55 - 65cm
- Permanent fixation with drilling of the instrument
- Weight: 50 gr.
- Made in France
After-Sales Service

- Our products are guaranteed against any manufacturing defect for 2 years from the date of purchase.
- We are at your disposal and we will always remain so in time for any question relating to the use of our systems on your instrument.
- Your complete satisfaction is a priority for us. Consult the online help and contact us if you cannot find the solution to your problem.
- Refer to the CGV on www.ischell.com for more information on the warranty.
Contact
ISCHELL MICROPHONES 119 impasse de la gare – 44800 Saint-Herblain – FRANCE
Tel: +33 (0)6 62 09 54 91 – Email: info@ischell.com

