Handpan, Hang...

Installation
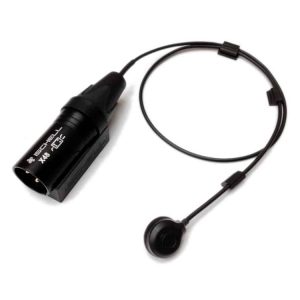
Removable systems: X48C / X-Jack / 2X48CC
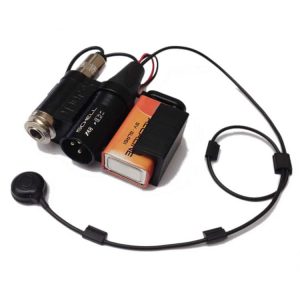
Systems with microphone kit: CJM / CPJ /2X48+ CCPJ

- These systems can be used occasionally outdoors, but it is advisable to install them indoors when possible. The sound will be stable between sessions, the microphone will be protected, invisible and your system will be ready to go at all times.
- Plan your cable route and system placement.
- Clean the places where the Velcro tape is sticking to the system.
- Please note: It is important that the search area is clean and free of greasy. If you use oil or wax for the maintenance of your instrument, it will be important to degrease these areas before installation.
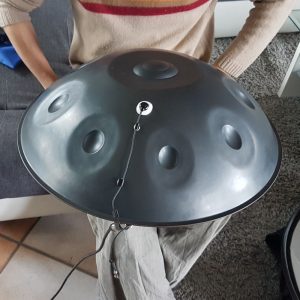
- Place the contact microphone in the desired location outside with white audio putty, a 3 cm cable tie with a little putty then try. Adjust the mic placement if necessary several times, see below.
- Once the right location has been found on the outside, precisely locate the place of installation and also the insertion of the microphone in the putty, for that make a statement with the wedge before removing it.
- Then if the opening allows to pass the hand, you can try to put it inside in the same place, you should find the same sound, generally a little softer, with less attack, which can in some cases better reflect the acoustics of the instrument.
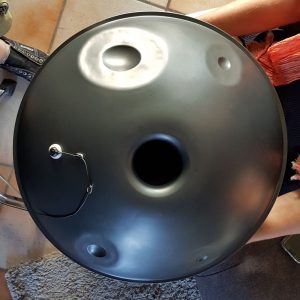
- If possible, secure the system (plugged in to validate placement) on the inside bottom, near the vent with Velcro, so the entire system is invisible and protected. Then just plug / unplug inside. Otherwise, near the vent on the outside with the Velcro provided, or on the foot if you have the hanging system.
- Your system is delivered to you with the low cut positioned on 360Hz. If after determining the best placement you find that the sound lacks bass, then set the low cut to 180Hz. If you find that the sound still lacks depth in the bass, set it to Flat.
- Adjust the compression if necessary. If the notes are more or less strong, try pressing the microphone again in order to compress the sound, which can correct these problems of note power, but also of harmonics that are too present, if possible use the wedge provided .
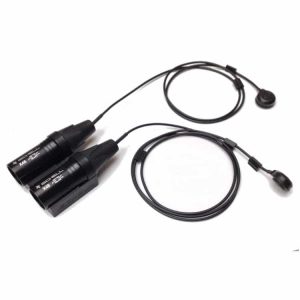
- In the case of a second contact microphone, place it if possible on top of the instrument to create a stereo, or at the same level as the first to create two different mixes ...
Positioning of the contact microphone
- As a reminder, it is important to properly prepare your contact microphone for installation, do not hesitate to reread the advice below depending on your model:
- Original C1 contact microphone preparation page
- C2 and C3 contact microphones preparation page
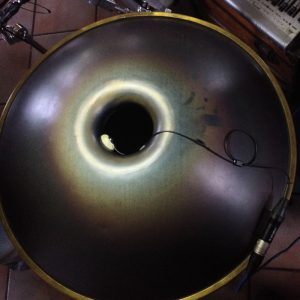
- There are exceptions but by default the placement is done on the first quarter of the lower part of the instrument, precisely centered at the lowest note.
- The sound is generally duller, rounder and more powerful at 4/5 cm from the edge of the vent and within 4/5 cm from the top. The central part forming a band around the instrument where the sound is more metallic and shiny, with harmonics that can go a little in all directions. the point of equilibrium is generally found in the center of these two zones, the low side first.
- If the sound is a little muffled, with low notes a little fuzzy or spinning, move it closer to the center.
- If the sound is too high-pitched or metallic, lower it a bit.
- If you can't find balance in this area, try in the upper part, 4/5 cm from the top edge, then fine-tune the placement.
- The sound change to within a few millimeters, experiment by moving it 1 cm at the start, then refine precisely to the nearest millimeter if necessary.
- If after setting the best location the sound remains too bright or too rich in harmonics, try rest the microphone in the same place with gray putty for a duller sound in the treble and rounder in the bass.
- If the notes or strings are still more or less strong, you can compress the sound which can correct the problems of note power, strings but also overtones too present. Refer to the preparation of your contact microphone to learn how to compress the sound.
- Depending on the instrument, you can reach extremes such as placing the microphone on the inner edge of the vent or very close to the assembly of the two parts of the instrument ...
- When you've found a satisfying place outside, you can put it inside in the same place. The sound is generally smoother, with a little less attack in the sound which corresponds well to the sound perceived by the listener.